Masks
Attribute
Attribute
The attribute to use as a mask.
Paint Attribute
This is a work around until Blender makes their own attribute painting system and allows for editing attributes created in geometry nodes.
Edit the attribute mask if one is selected, otherwise create a new one and edit.
Things to be aware of for this work around:
This operator creates a duplicate mesh that stores the attributes on it for this terrain. This mesh is not updated again until the button is pressed. See the Advanced settings below for alternative options to deal with the mesh not updating.
From Min
The lower bound of the range to remap from.
From Max
The higher bound of the range to remap from.
To Min
The lower bound of the target range.
To Max
The higher bound of the target range.
Advanced
Only visible after using the Paint Attribute button
Keep Dimensions
Scale the attribute mask to match the dimensions of the terrain regardless of changes after the fact
Same Topology Override
Force using ray casting as method to grab the attribute. Don't assume the meshes have the same topology.
Ray Length
Distance to look for the attribute mesh
Distance Mask

Use the distance from an object to mask the current layer
Object
Select the desired object that will serve as the center of the distance mask, where the values will be set to 1.0. This selected object will act as the focal point for the distance mask, with its associated values set to 1.0.
Distance
How far out to fade out
Min Density
The multiplier at the end of distance and to eternity. This effectively lets in more of the previous layers
Max Density
This multiplier at the object.
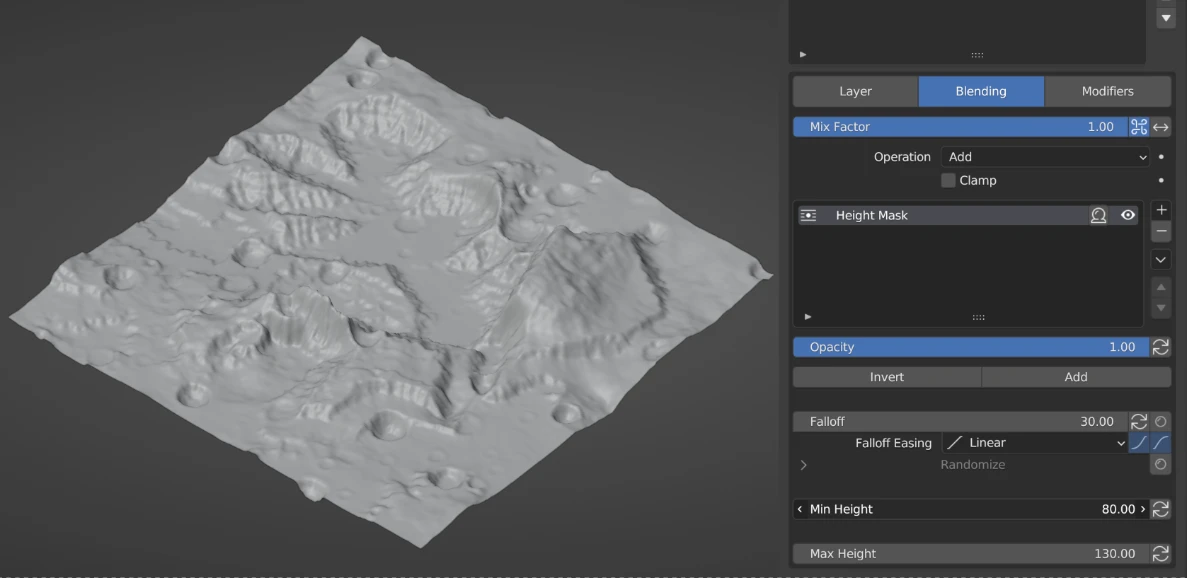
Height
Split Falloff
Use different falloff values for minimum and maximum
Split Randomize
Use different radomize settings for minimum and maximum
Min Height
The lower limit of the mask
Max Height
The upper limit of the mask
Normal
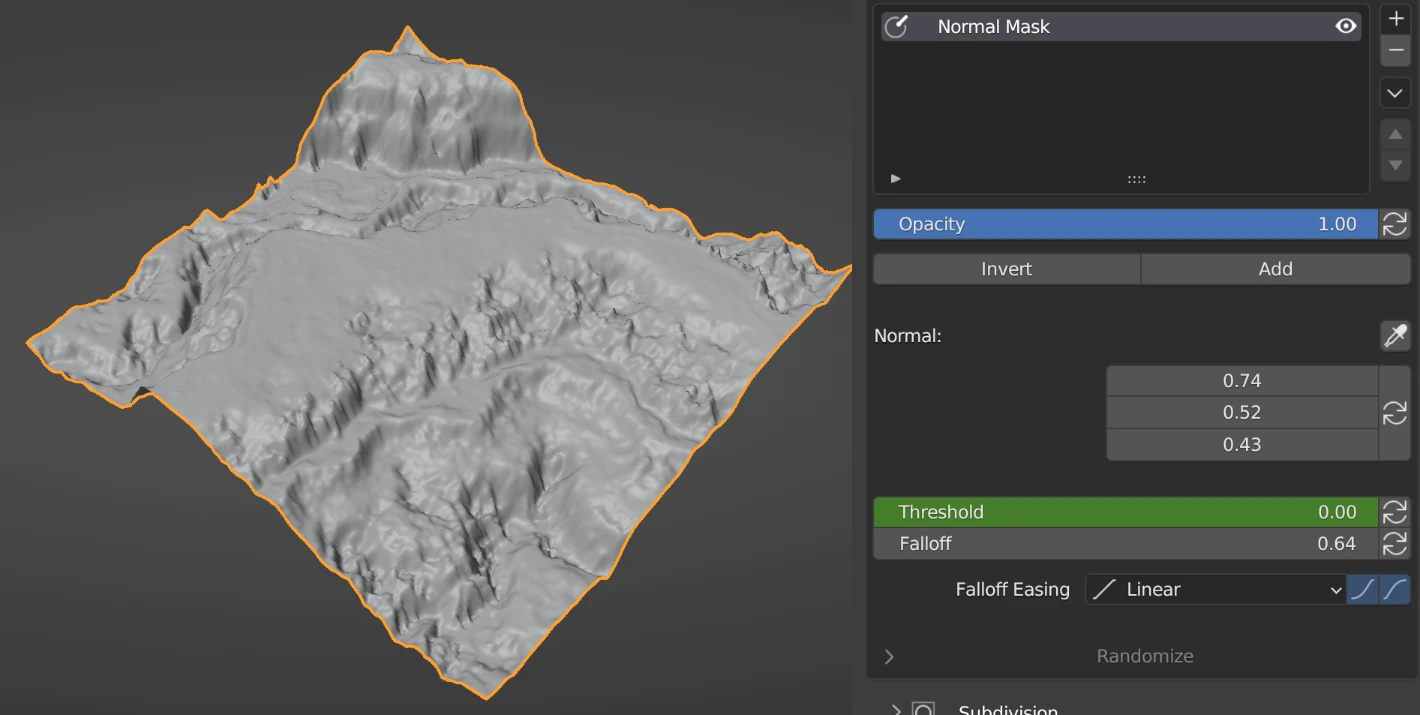
Normal Picker
Choose a normal by clicking on a place on the terrain
Target
The normal vector that is being targeted.
Threshold
Permits vectors that are in proximity to the designated Target to be included as well.
Patch
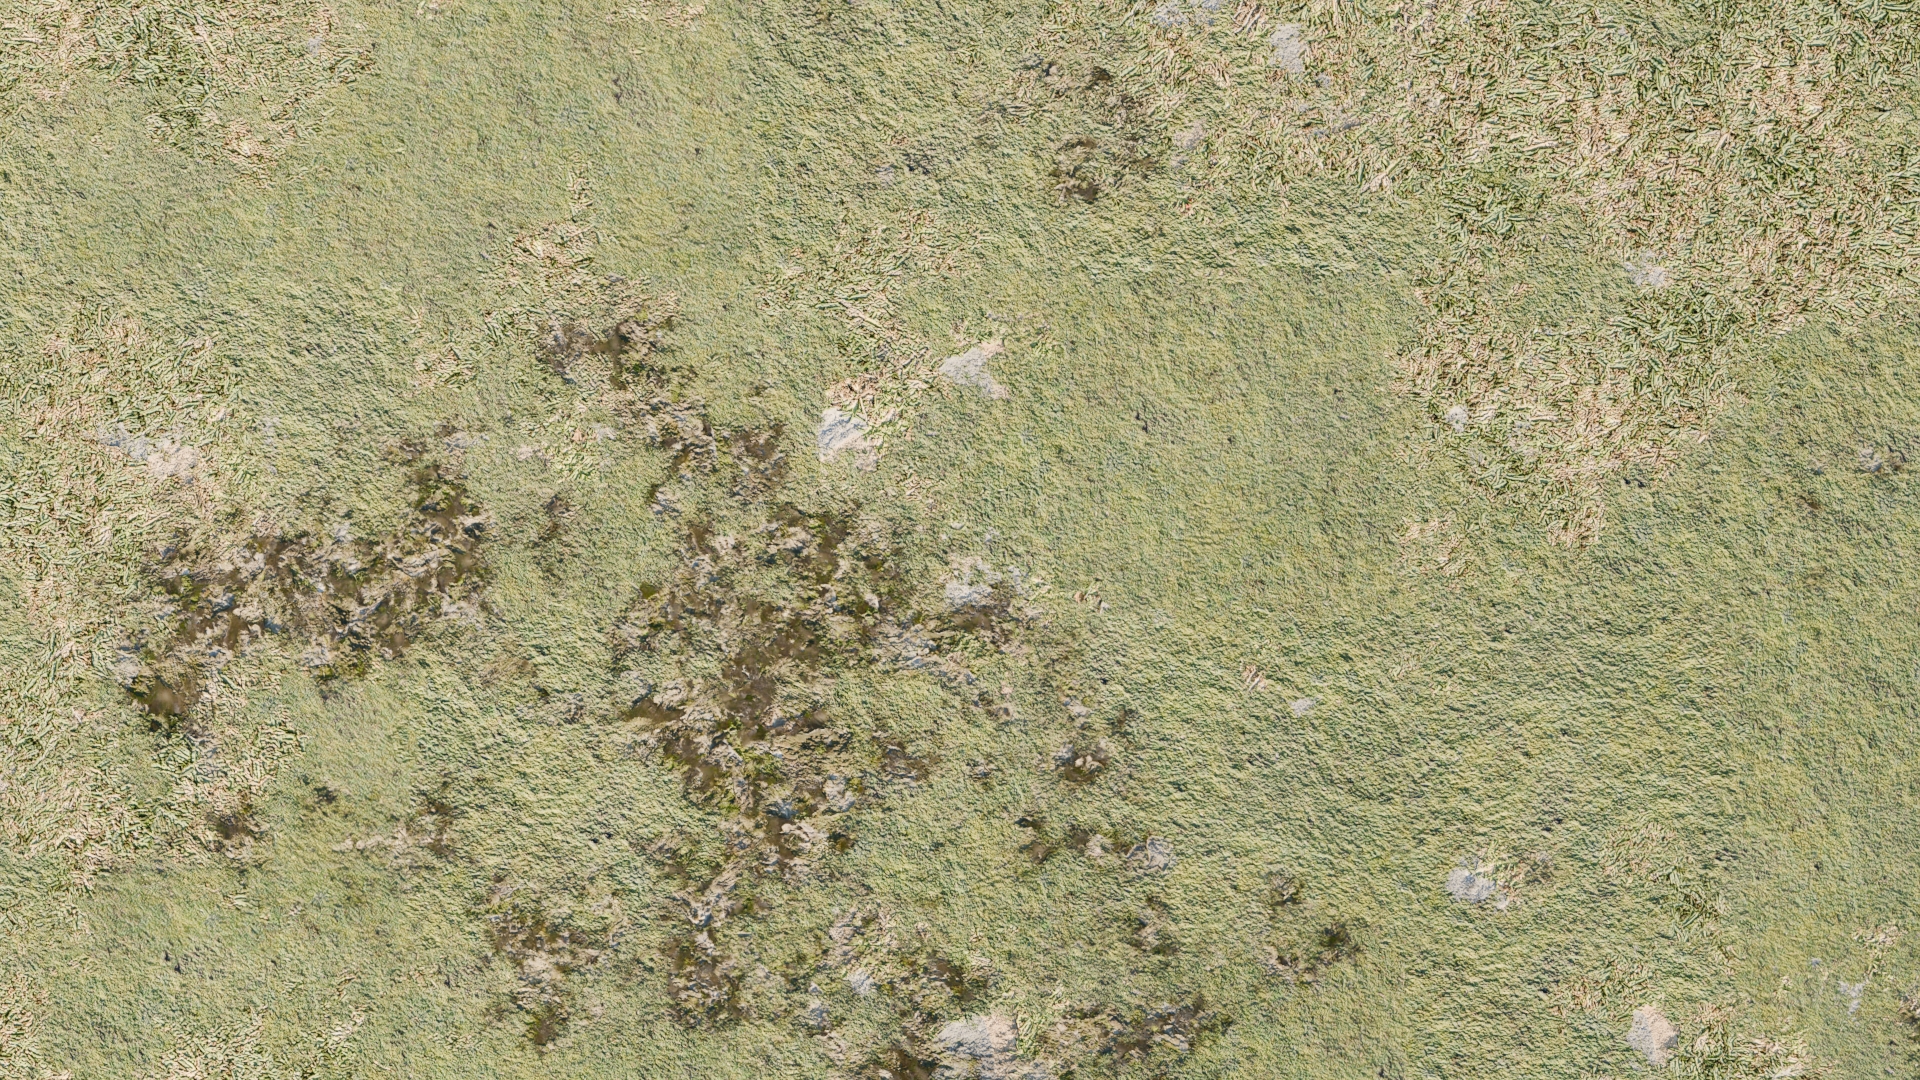
Easily vary the shader layers in order to break up a monotonous texture
Seed
Randomize the patch locations.
Amount of Patches
Increase the scale of the patches.
Mask Expansion
Grow or shrink the patches to see more or less of the texture layer.
Edge Noise
Vary the amount of randomness along the edges of the patch.
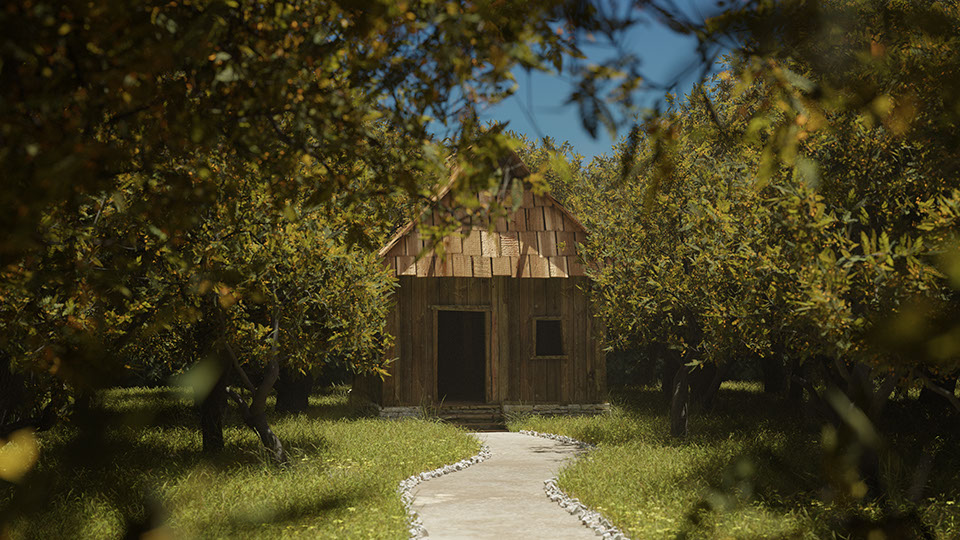
Example

In the above image there are 4 different grass layers all using patch masks to blend together.
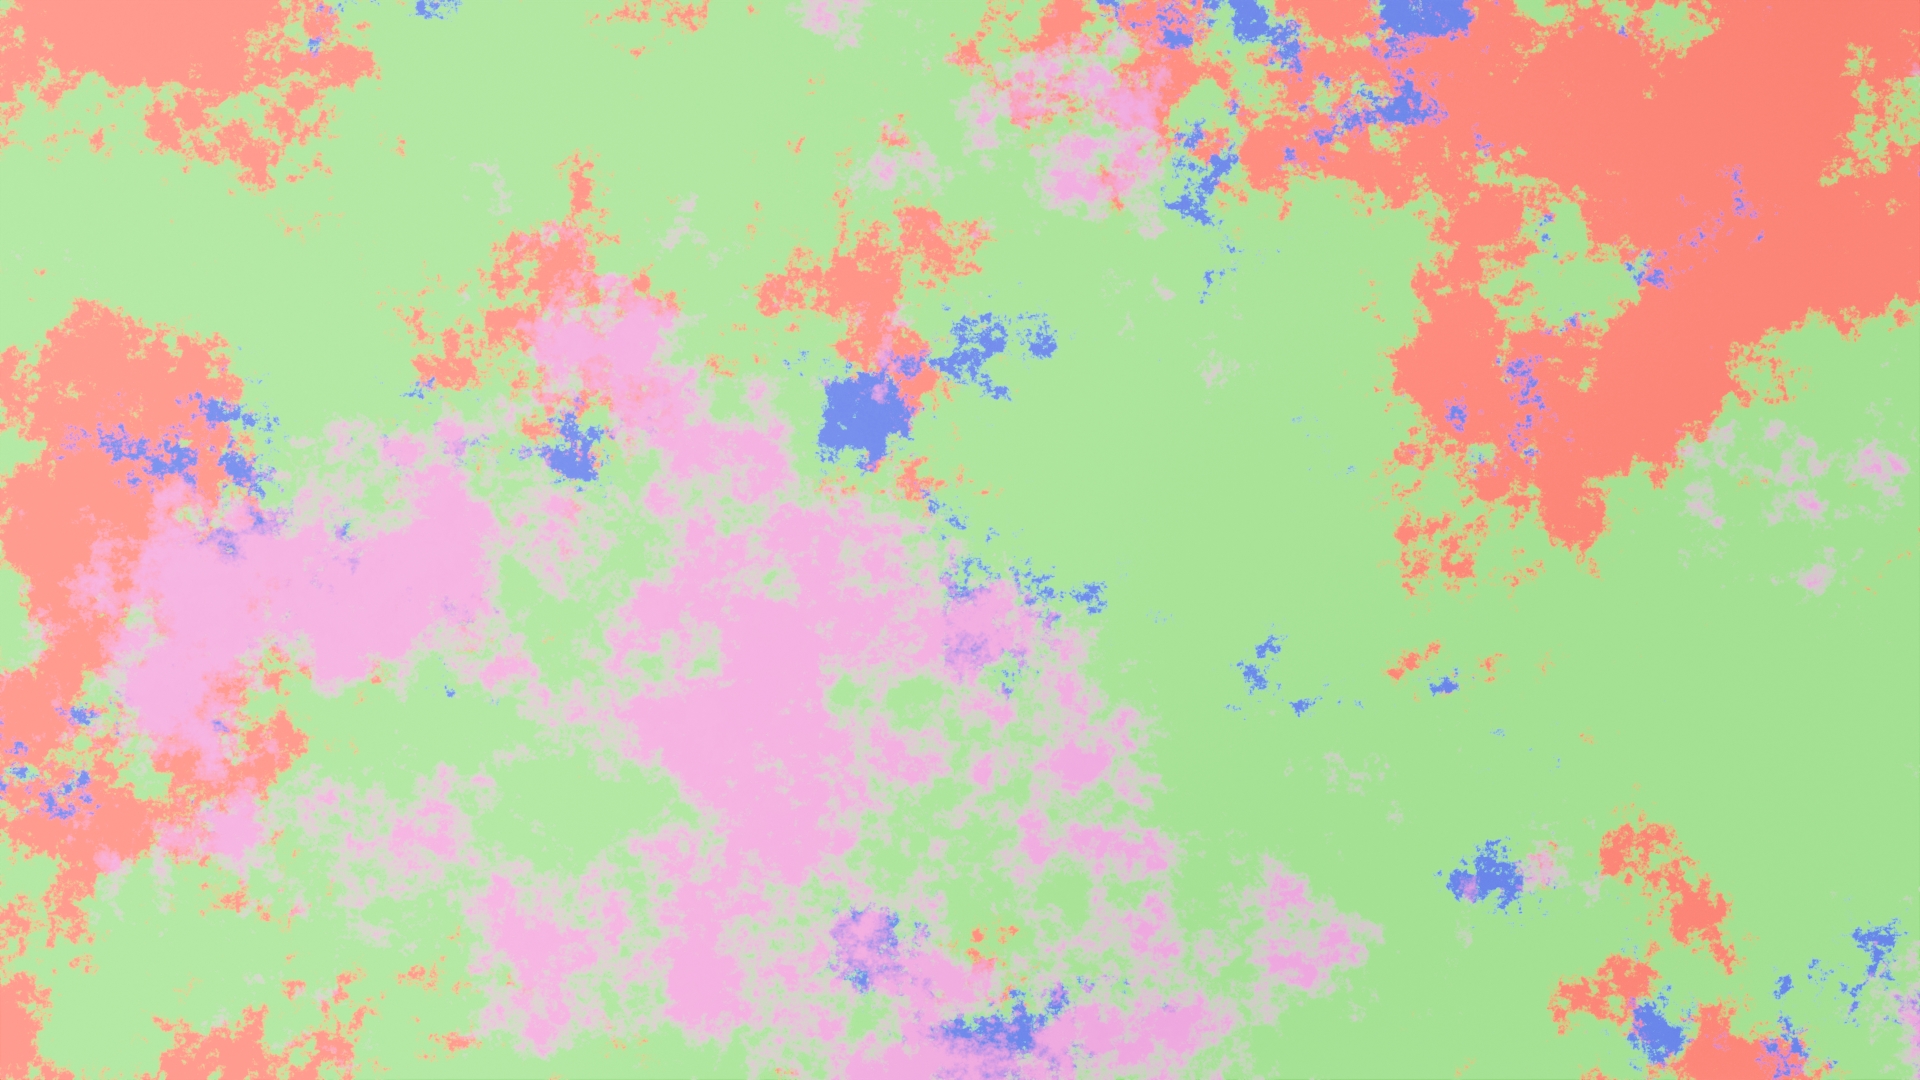
This image shows the distribution of each layer. Each color is a different layer.
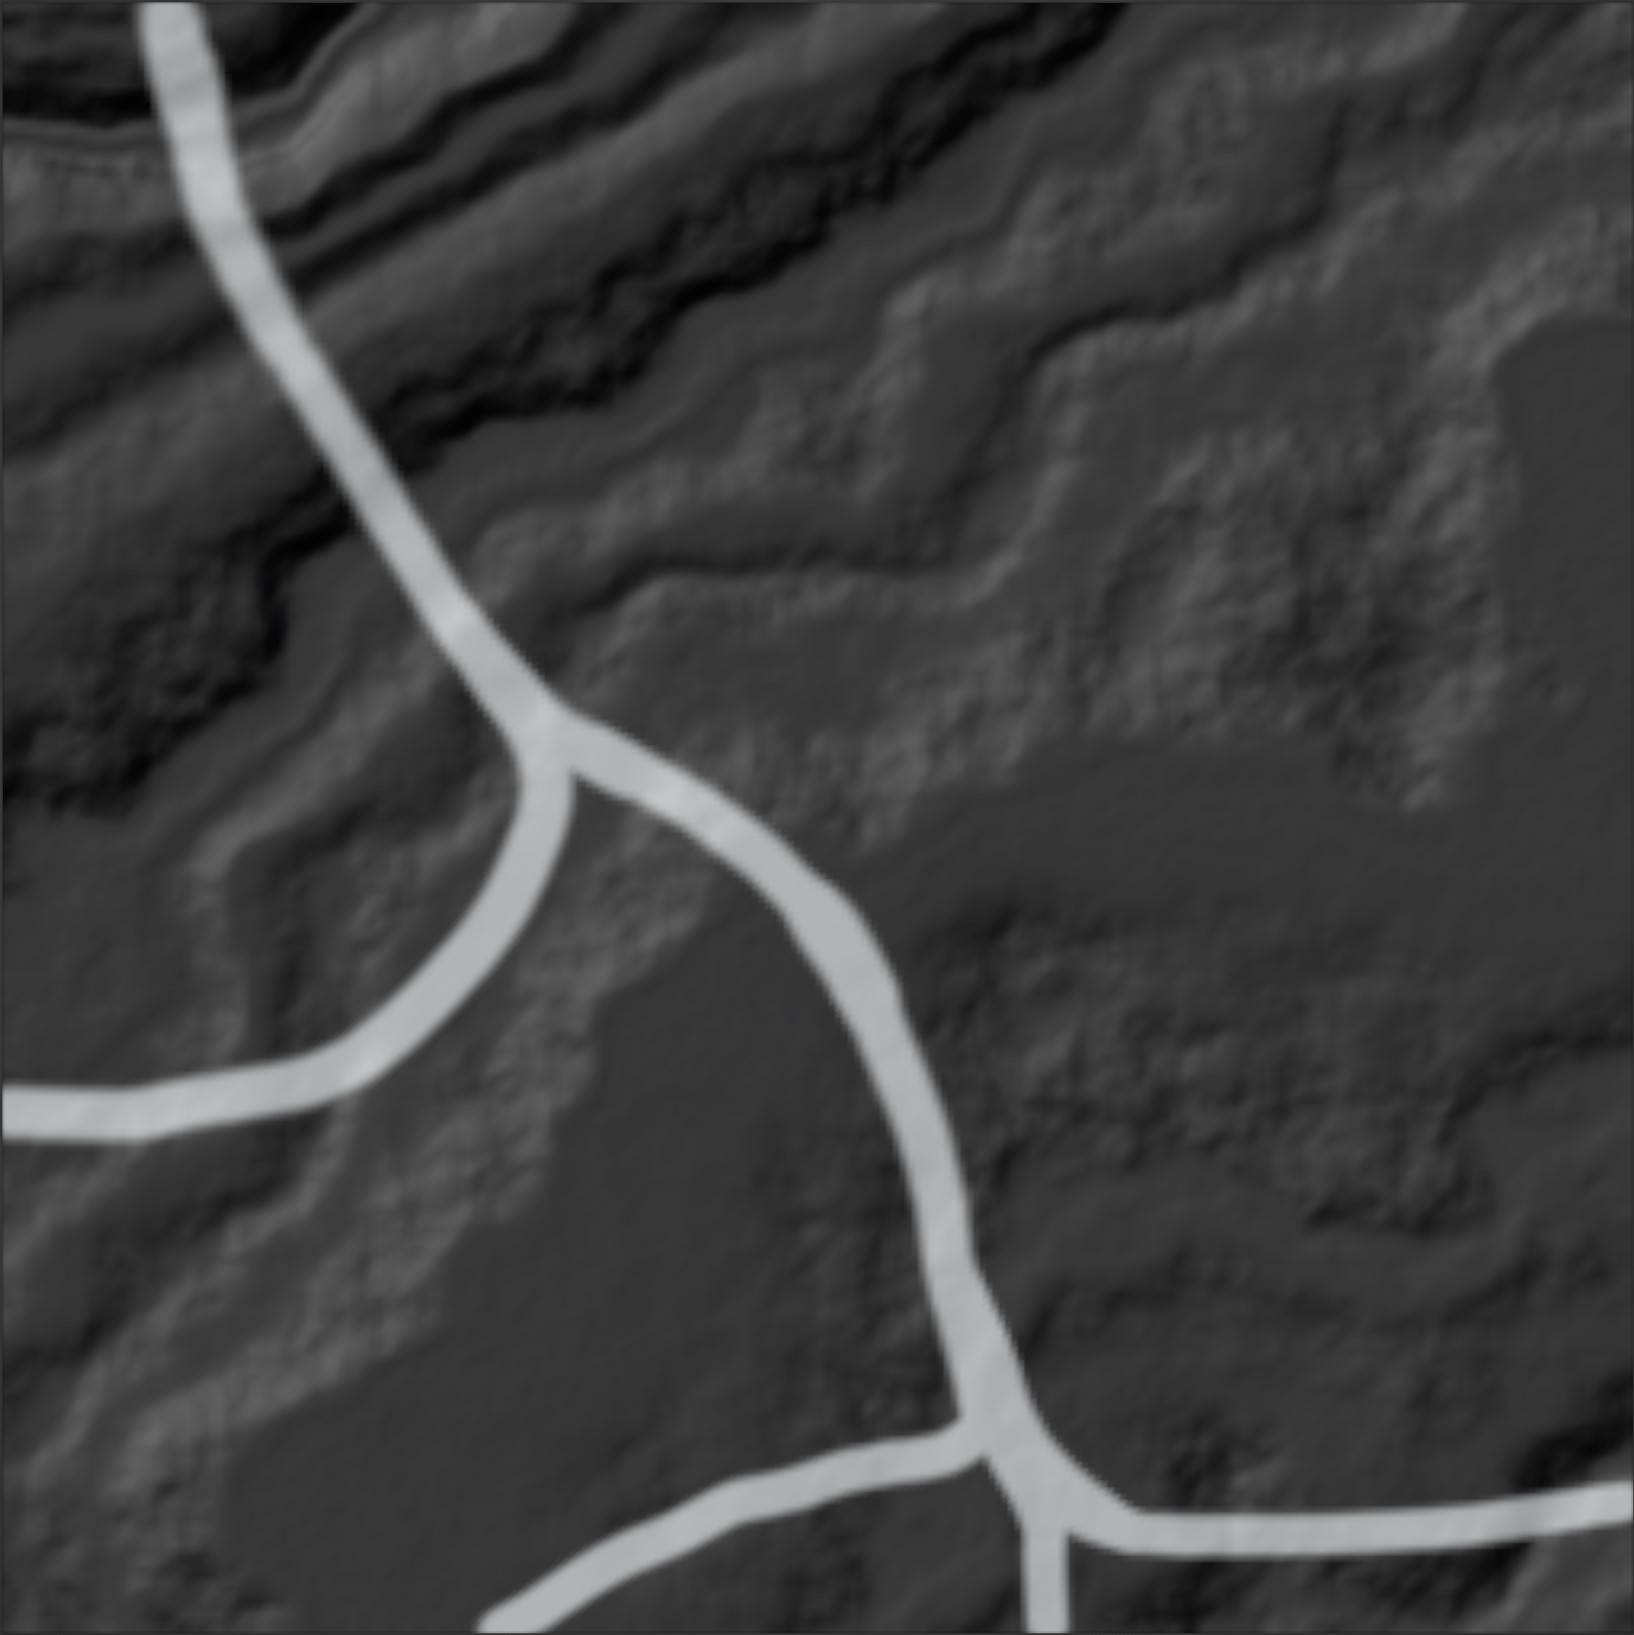
Path
Curve
The curve to use for the path
Draw Curve
Easily set it up for drawing a curve object for the path.
Resolution
Change the resolution of the curve for smoother lines.
Distance
How far from the curve the path should extend.
Distance Mode
Where to pull the distance
-
Relative Radius (Default): Distance works as a multiplier of the radius of each control point. The default radius of a control point is 1 so if no control points are set this will act exactly like the Distance setting.
-
Distance: The path will extend exactly the amount from the curve as set
-
Radius: The radius of each control point alone affects the distance
Remap Values
The Remap Values mask is more of a modifier to the masks than a mask itself. It does not add or remove anything to the mask but instead edits the values as they exist up to this point in the stack.
This mask modifer edits the values in 3 possible ways:
Map Range
Utilize From Min/Max and To Min/Max values to modify the range of the mask's values. This method allows you to remap the existing range to a new range.
Easing
Employ predefined curves or create a custom curve to adjust the range of values. Easing functions enable you to control the smoothness or sharpness of the transition between values.
See Easing Functions for more information.
Ramp
Use a ramp to manipulate the range of values. By configuring the ramp's control points, you can reshape the mask's values to suit your requirements.
Slope
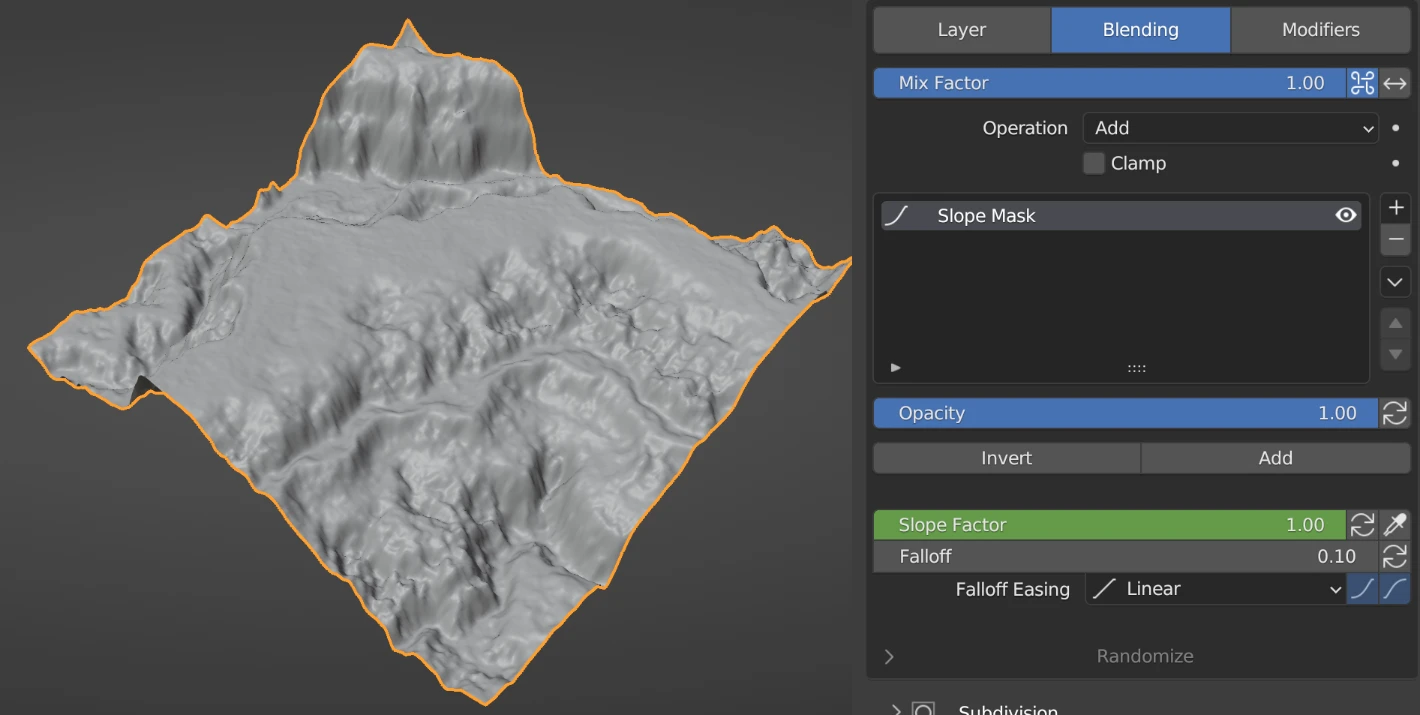
Slope Factor
The extent of incline that is incorporated into the mask. A value of 0 signifies that no slope is included, encompassing areas that are flat and parallel to the ground. On the other hand, a value of 1 implies that slopes up to and including 90-degree cliffs are considered and included in the mask.
Strata
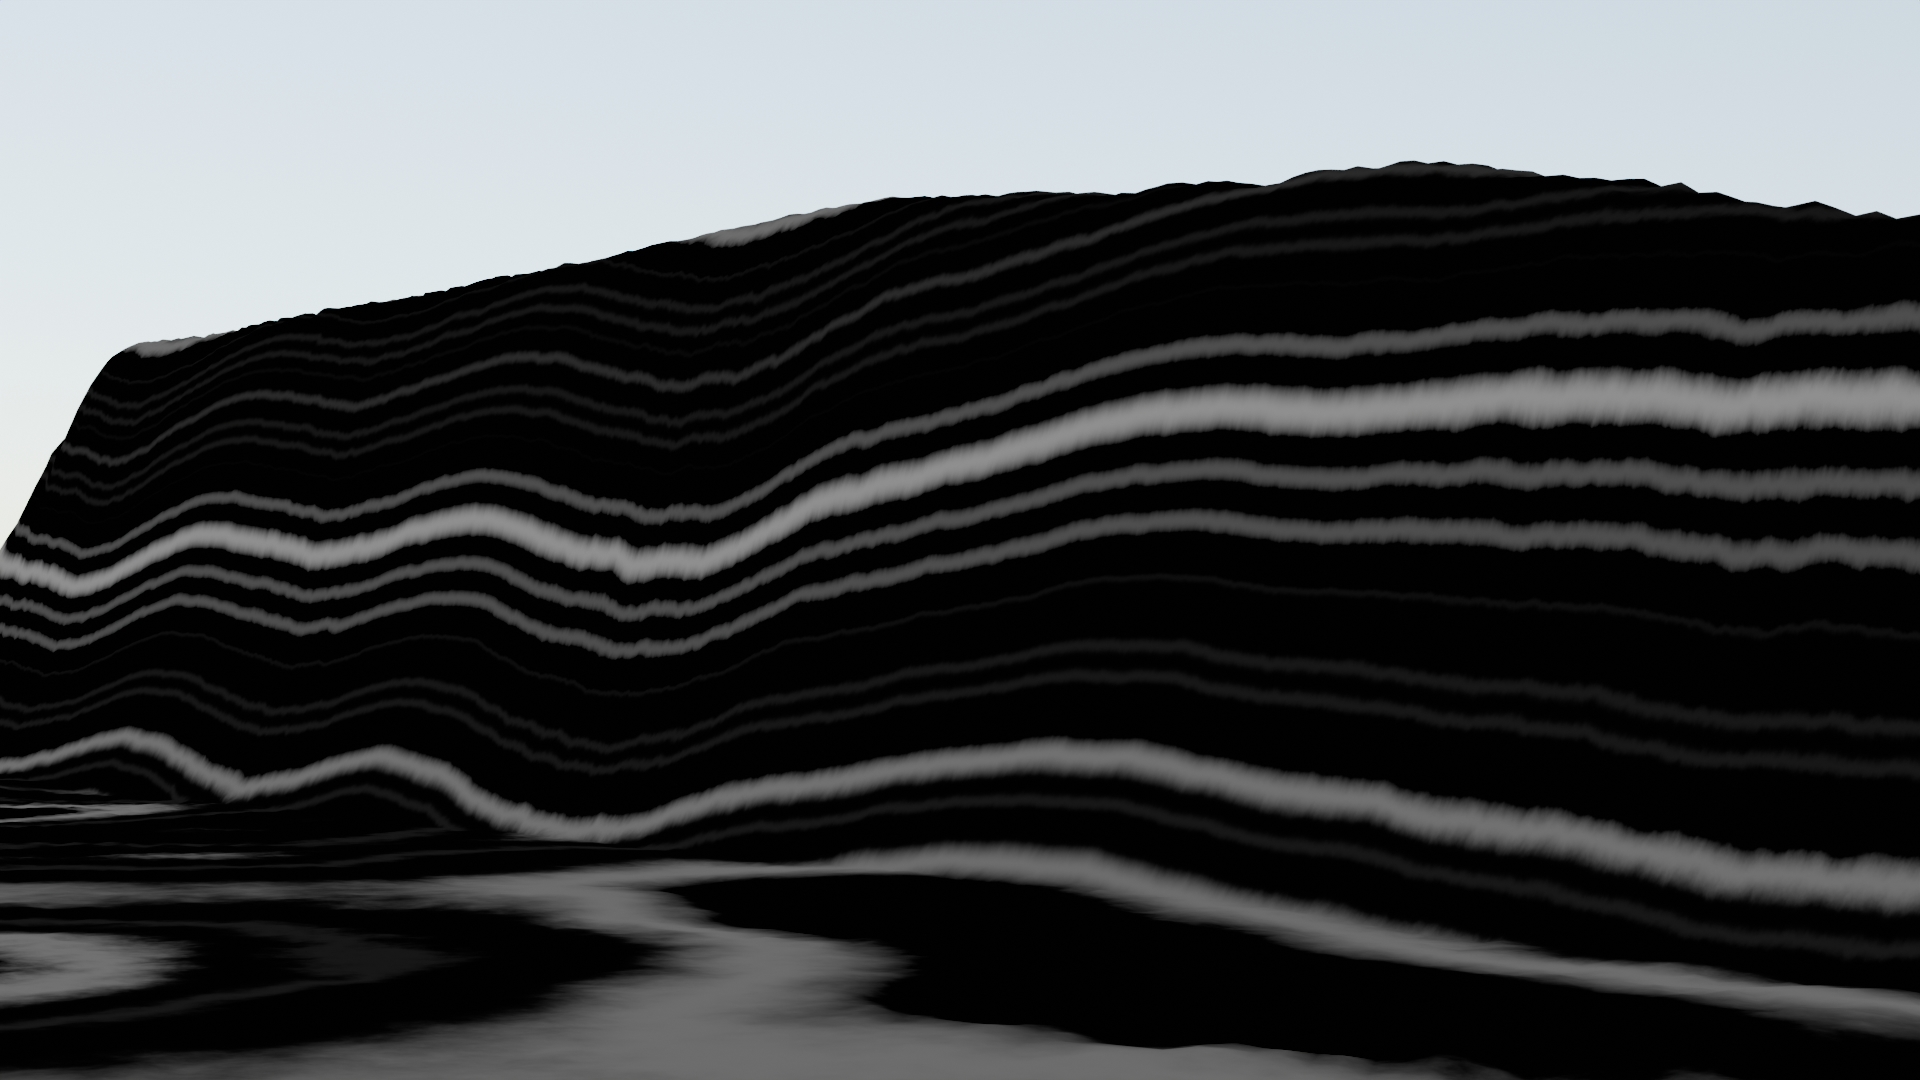
Seed
Randomize the strata pattern.
Distortion
Scale
How large the strata pattern will be.
Strength
How strong the distortion is in any given direction.
Detail
Vary the randomness of the strata edges.
Texture
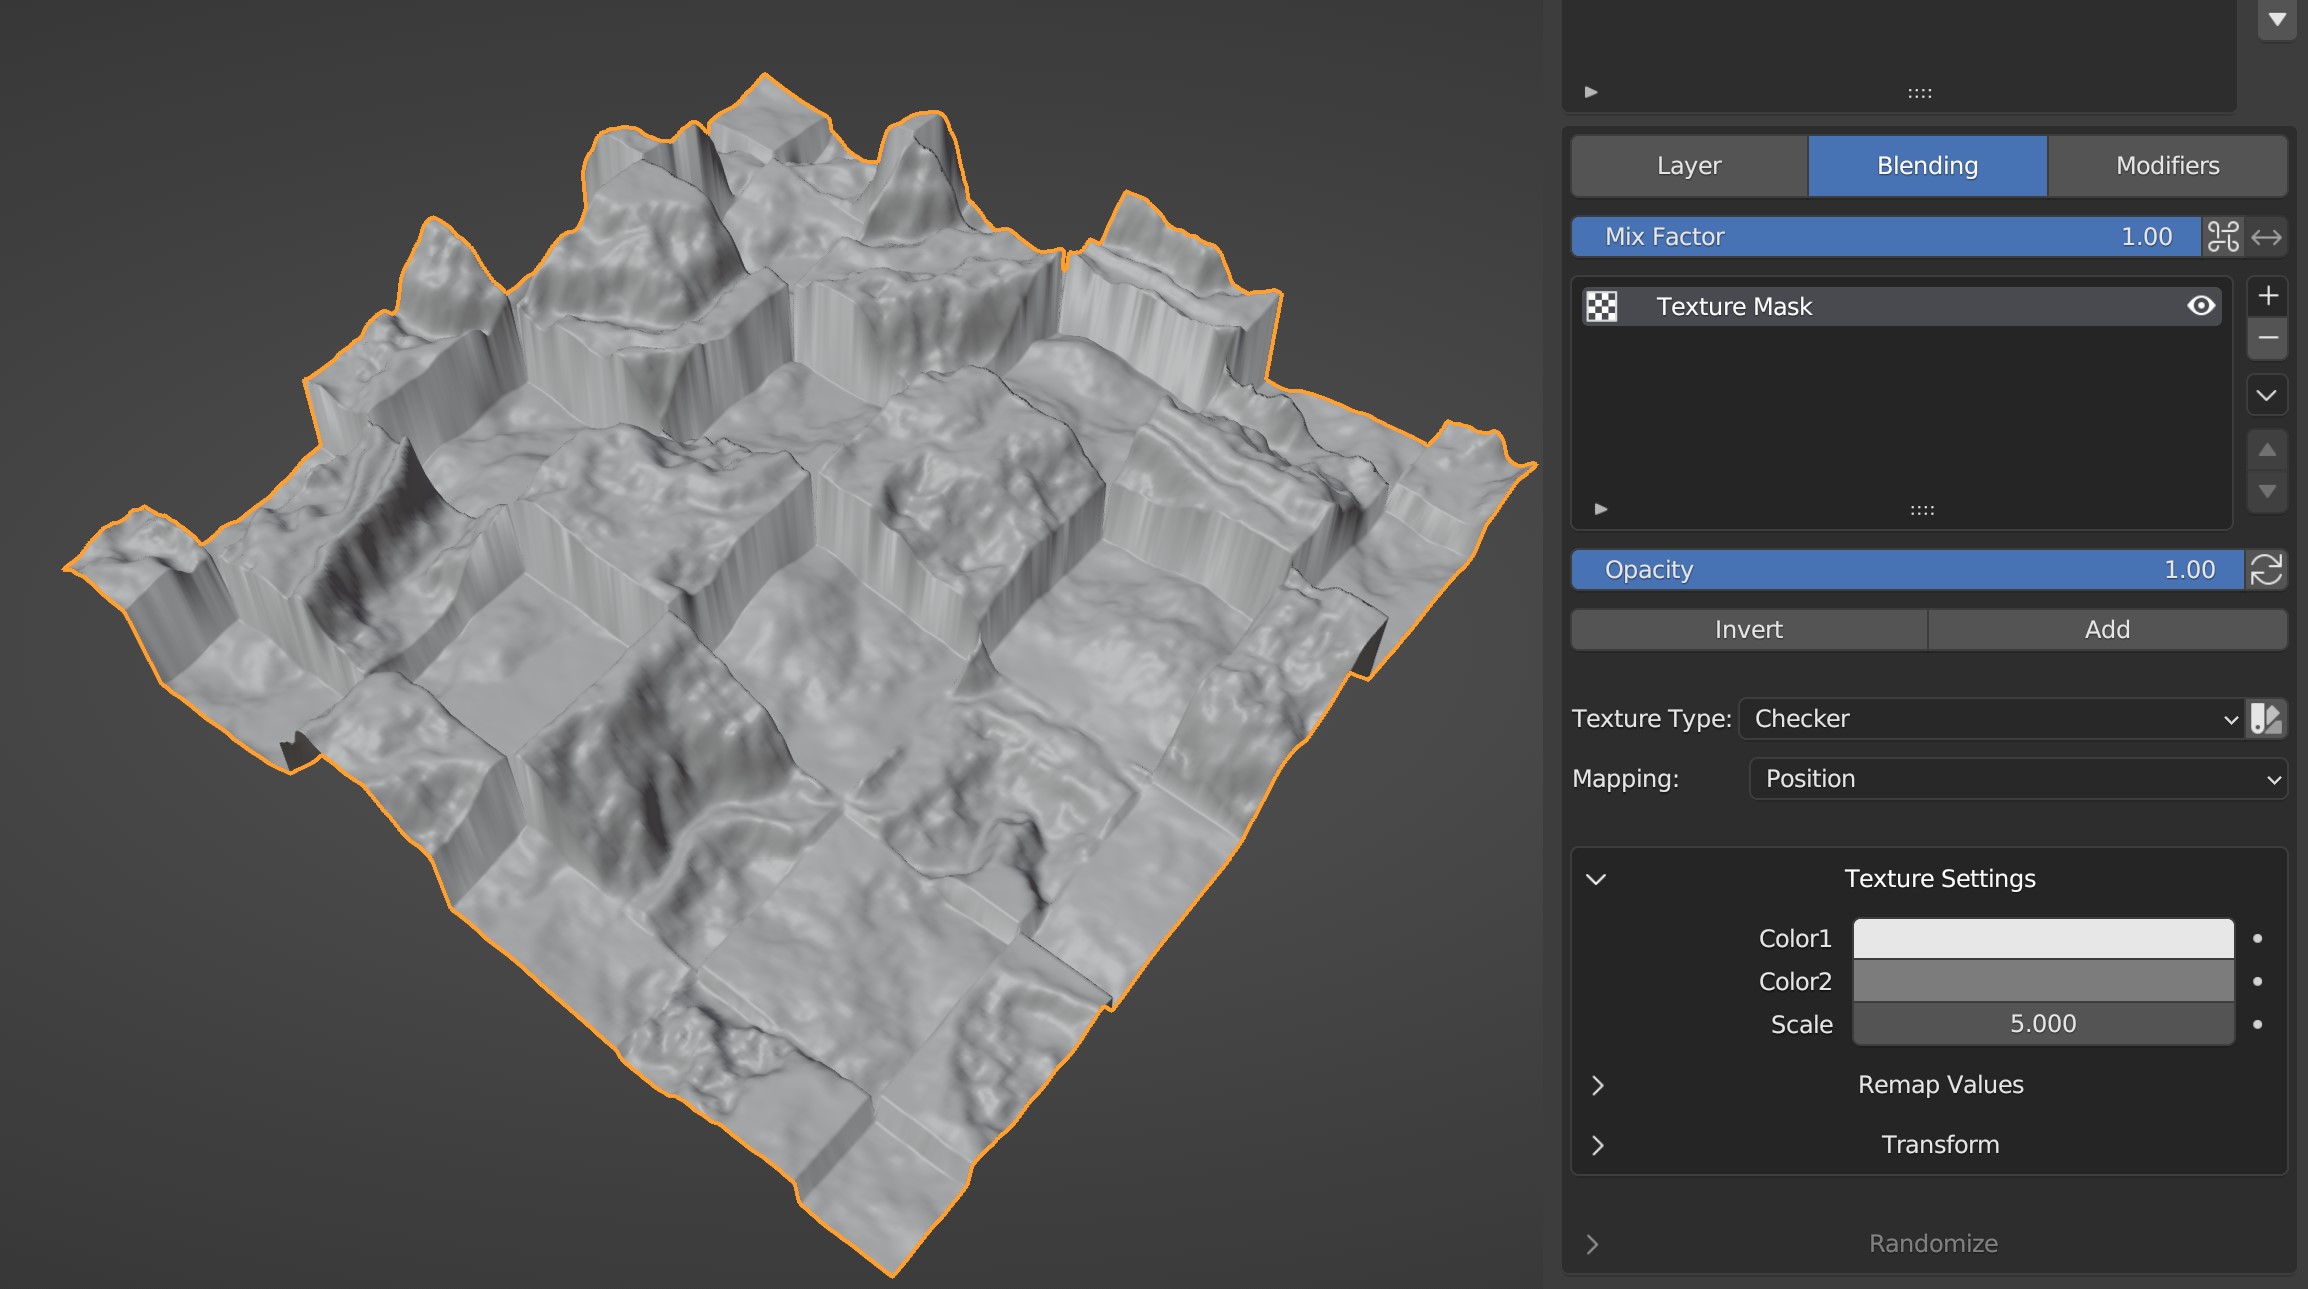
Use a texture to blend between the current layer and previous layers.
Texture Type
The type of texture to use
Pick From RGB
Many texture types output a color. With this enabled you can choose what channel of the color to use as the blend mask. Otherwise the single value output is used or the color is averaged if there isn't a single value output available.
R/G/B
The RGB channel to use for blending of the active texture
Mapping
Use either the position of the vertices or the object's UV Map to place the texture.
UV Type
Whether to use the regular UV Maps or Attributes from geometry nodes.
Texture Settings
The setting of the active texture. See Blender Docs for more information.
Remap Values
To alter the range of values for this mask, you can employ various methods:
Map Range
Utilize From Min/Max and To Min/Max values to modify the range of the mask's values. This method allows you to remap the existing range to a new range.
Easing
Employ predefined curves or create a custom curve to adjust the range of values. Easing functions enable you to control the smoothness or sharpness of the transition between values. See the Easing documentation for more information on how to use easing curves.
Ramp
Use a ramp to manipulate the range of values. By configuring the ramp's control points, you can reshape the mask's values to suit your requirements.
Transform
Reposition, resize, or rotate the active texture.
Valley
The valley mask feature grants users the ability to focus on either valleys, which are concave areas, or ridges, which are convex areas. With this functionality, users can selectively identify and manipulate these specific topographical characteristics within the terrain.
Threshold
Adjust the level of inclusiveness to target areas that are progressively less concave or convex.
Use Ridges
Target areas that are convex or ridges
Falloff
The distance from the fully selected areas under the threshold to where the mask selection gradually fades out.