Presets
Building Presets
Presets are the best way to use TrueTERRAIN. Save your favorite layers, modifiers, and settings to easily reapply hours of work in seconds!
Start
Welcome to this quick tutorial on how to create your own presetsin TrueTERRAIN 5. This guide will walk you through each step, making it easy to build and store presets effectively. Let's dive right in!
Step 1: Setting up the preset
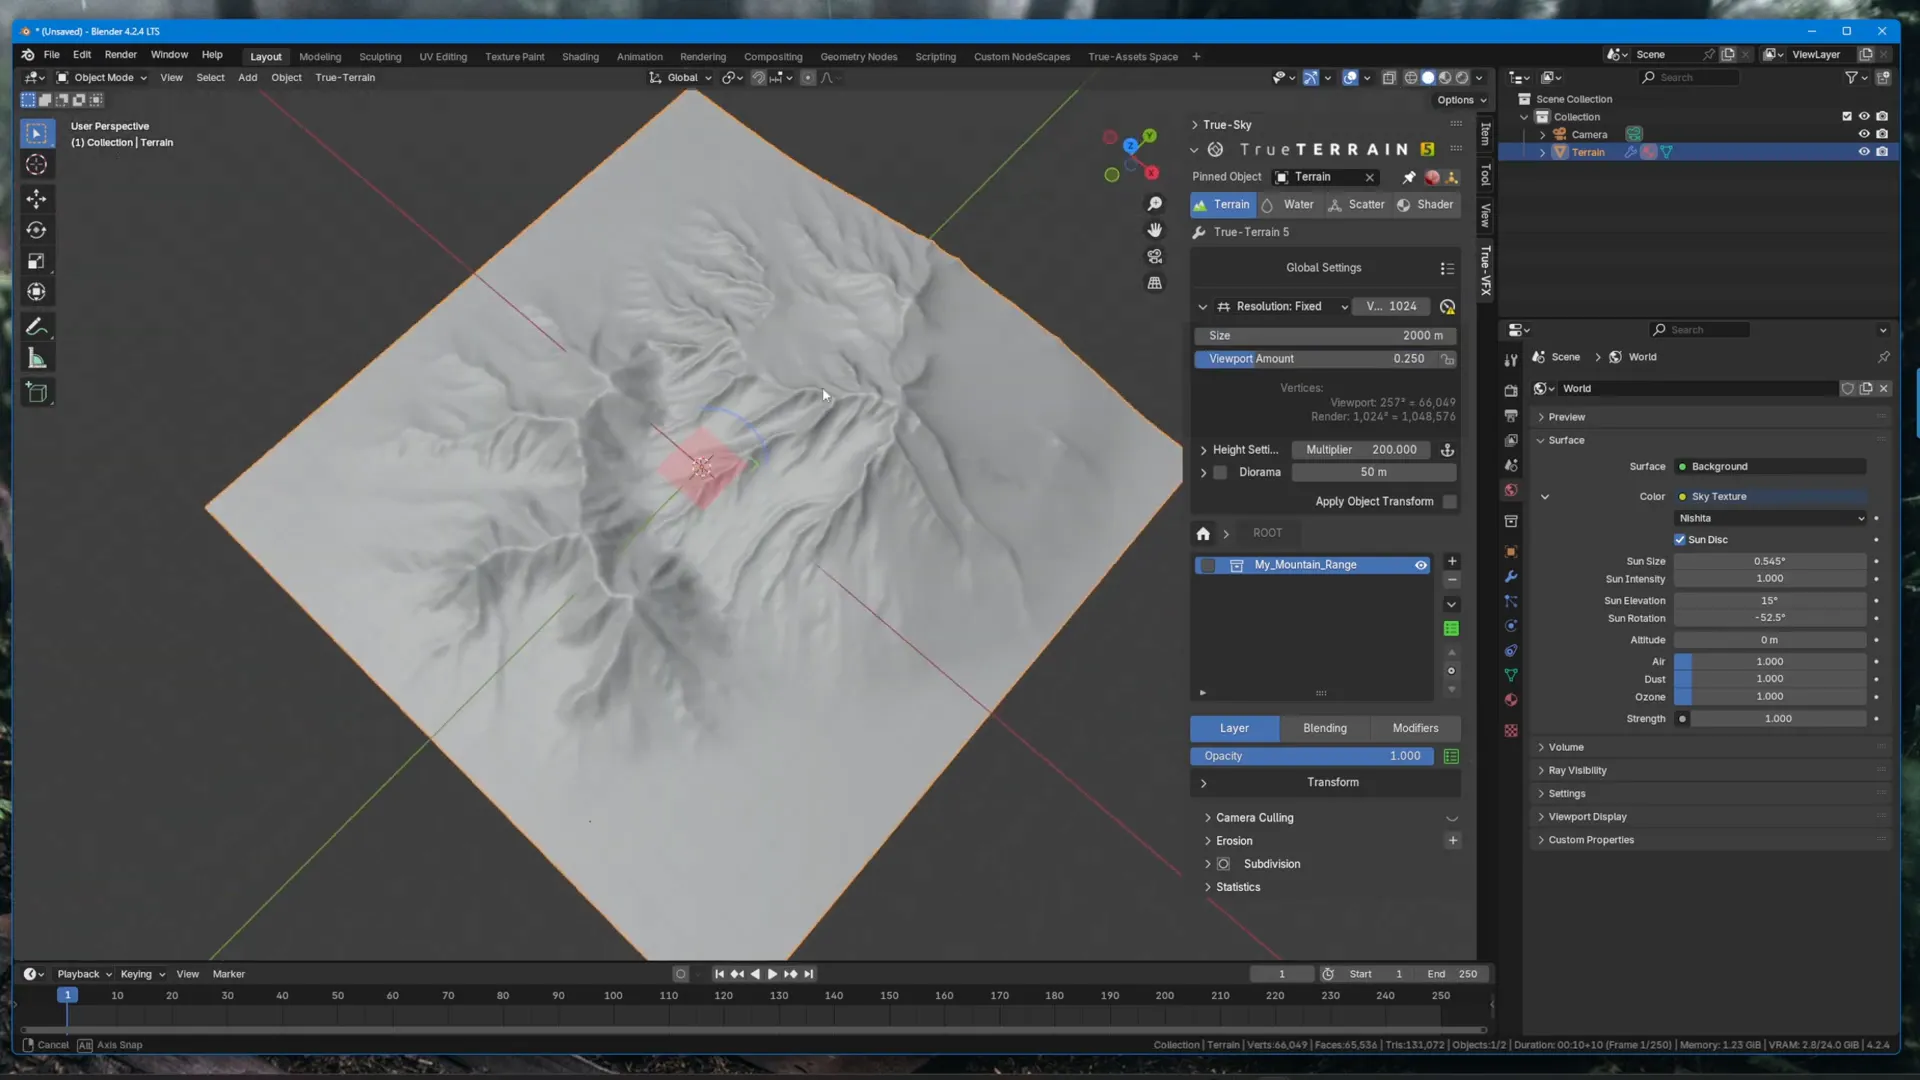
First, we need to set the stage for our preset. We will remove the default terrain noise and add two height maps:
- Grab a height map (e.g., a mountain).
- Move it to your desired position.
- Add another height map and position it accordingly.
Next, we can adjust some blending settings:
- Add a zero edge border to both height maps.
- Adjust the fall off settings to make transitions smoother.
Step 2: Building some settings
Now that we have our height maps, let's make some changes:
- Scale the mountains as needed.
- Increase the blending smooth extra value to blend the two layers more naturally.
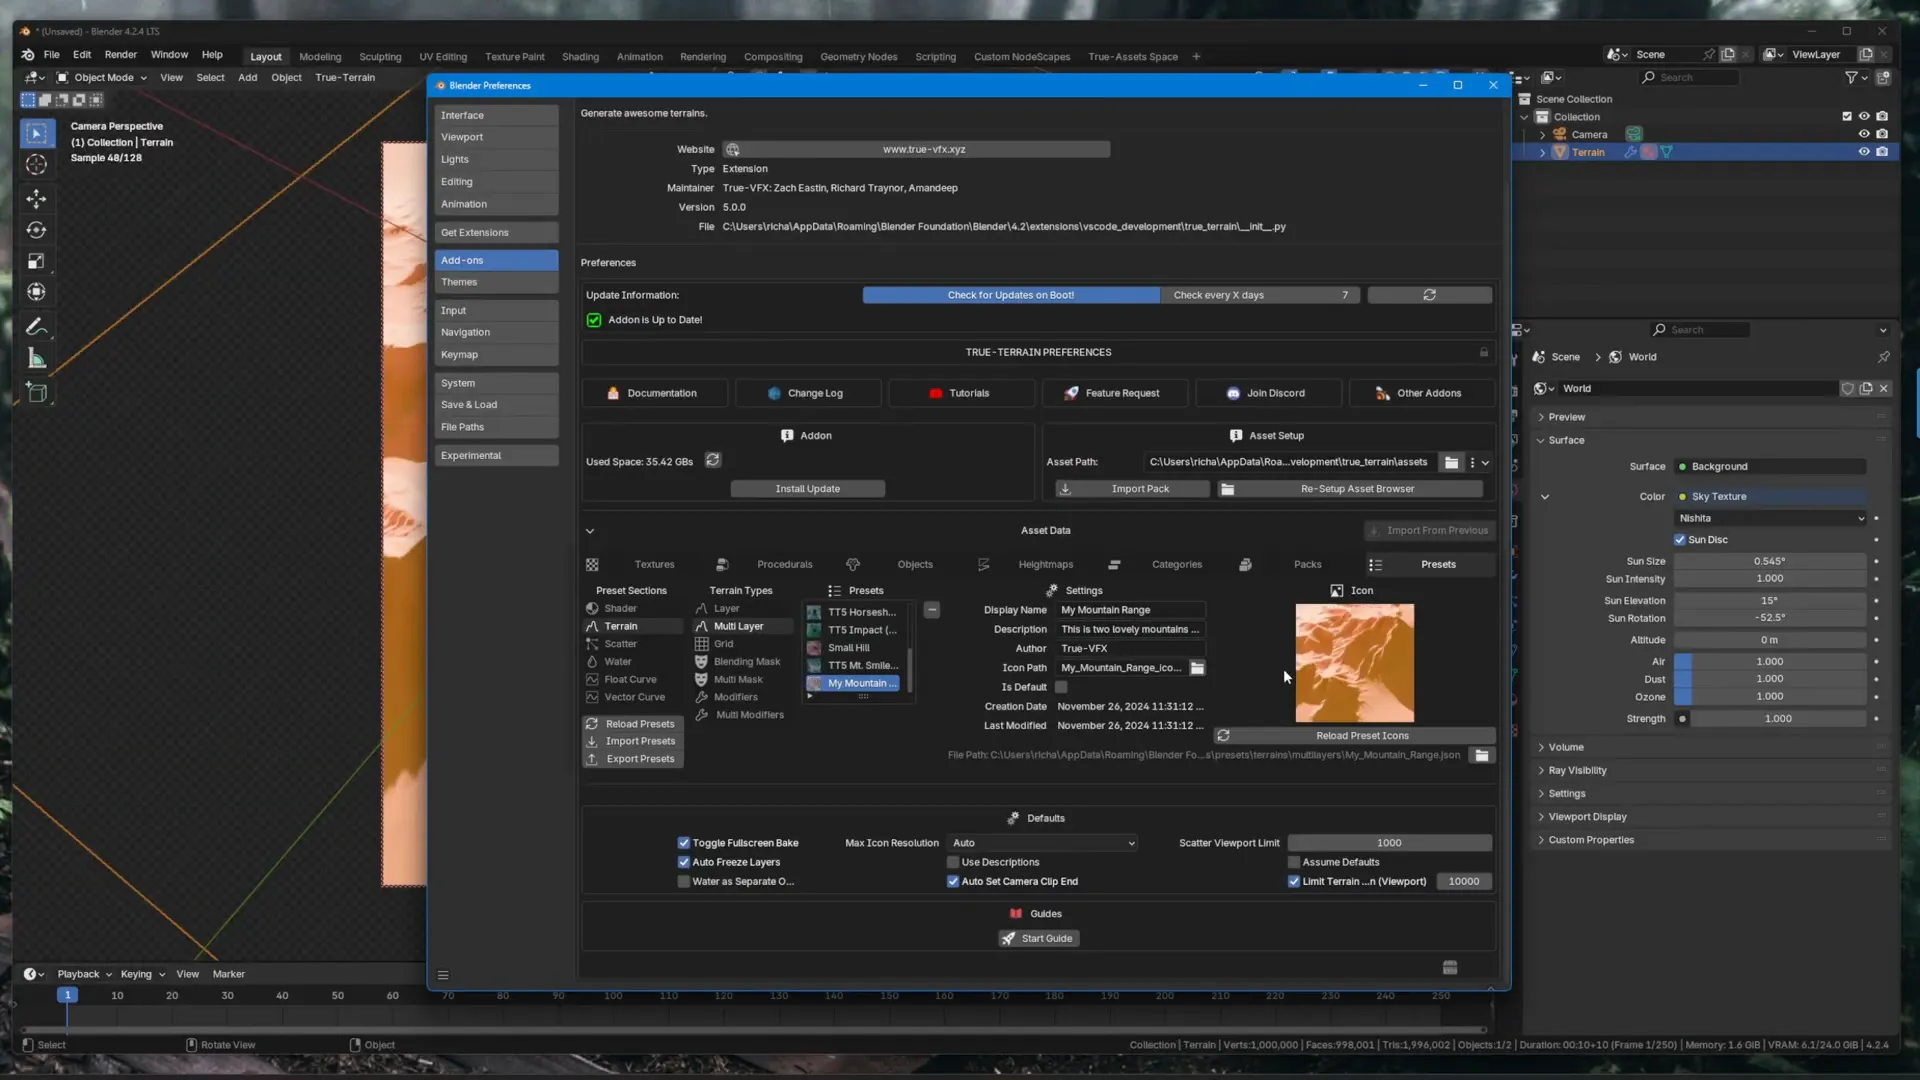
Step 3: Storing the preset
With our mountains set up, we can now store this configuration as a multilayer preset:
- Rename your height map layers (e.g., "mountain large" and "mountain small").
- Click the green multilayer button and then the plus button to create a new preset.
- Enter a name (e.g., "my mountain range") and a description.
- Set the author name (e.g., "True-VFX").
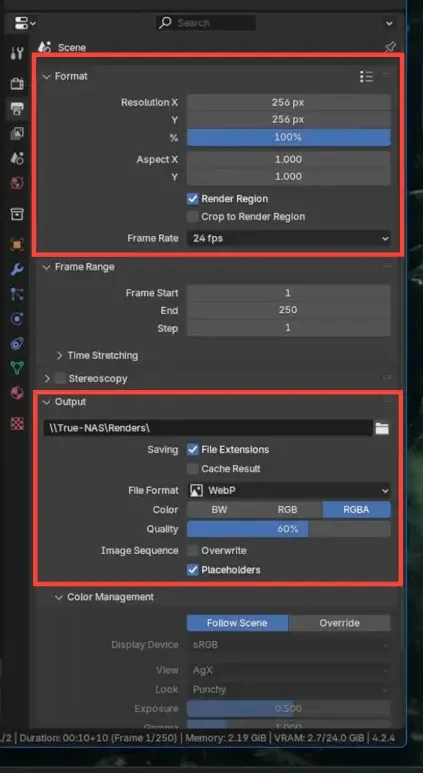
Step 4: Prepping the icon
Next, we need to create an icon for our preset:
- Add a camera to your scene and position it near the terrain.
- Set the clip end to around ten kilometers.
- Adjust the image size to 256x256 for the icon.
- Change the image format to WebP and set the quality to 60.
Step 5: Assigning a material
To enhance our preset, we can assign a material:
- Create a new material or use an existing one.
- Link your material to the object. You need to make sure you swap the material link from OBJECT to DATA if using a custom material
- Adjust the material properties as needed.
Step 6: Rendering and setting the icon
Once the icon is rendered, we need to set it in the preferences:
- Navigate to the preferences section.
- Go to asset data, then presets, and find your new preset.
- Click the icon path and select the rendered icon file.
Step 7: Testing the preset
Now it’s time to test our new preset:
- Delete the existing terrain.
- Grab your new preset and click apply.
- Check that the preset loads correctly and retains all settings.
Step 8: Where can you make presets?
You can create presets for:
- Multilayer terrains
- Single layers
- Water, scatter, and shaders
Step 9: Preset guide
Each preset can contain:
- Full color blocks for multilayer presets.
- Colored outlines for specific functions within a layer.
This allows for flexibility in how you use presets across different terrains and materials.
See you in the next one!
That's a wrap on creating presets in TrueTERRAIN 5! Hopefully, this guide has helped you understand how to build and store your own presets effectively. In the next tutorial, we'll delve into creating entire scenes and utilizing presets in that context. Stay tuned!
Get TT5 now
Grab TrueTERRAIN 5 from Blender Market Terrain me, babyyy!
FAQ
Can I create presets for different types of terrain?
Yes! You can create presets for multilayer terrains, single layers, and even specific materials.
What image format should I use for icons?
We recommend using WebP format for the best compatibility.
How do I test my new preset?
Simply delete the existing terrain, grab your preset, and click apply to see if it loads correctly.
Where can I get TrueTERRAIN 5?
You can purchase it from the Superhive Marketplace.
Viewport Placement
Look for the presets icon anywhere there is a layer system. The main two are layers and modifiers. There are presets for adding new layers and/or modifiers as well as presets for just the settings of the visible layer/modifier
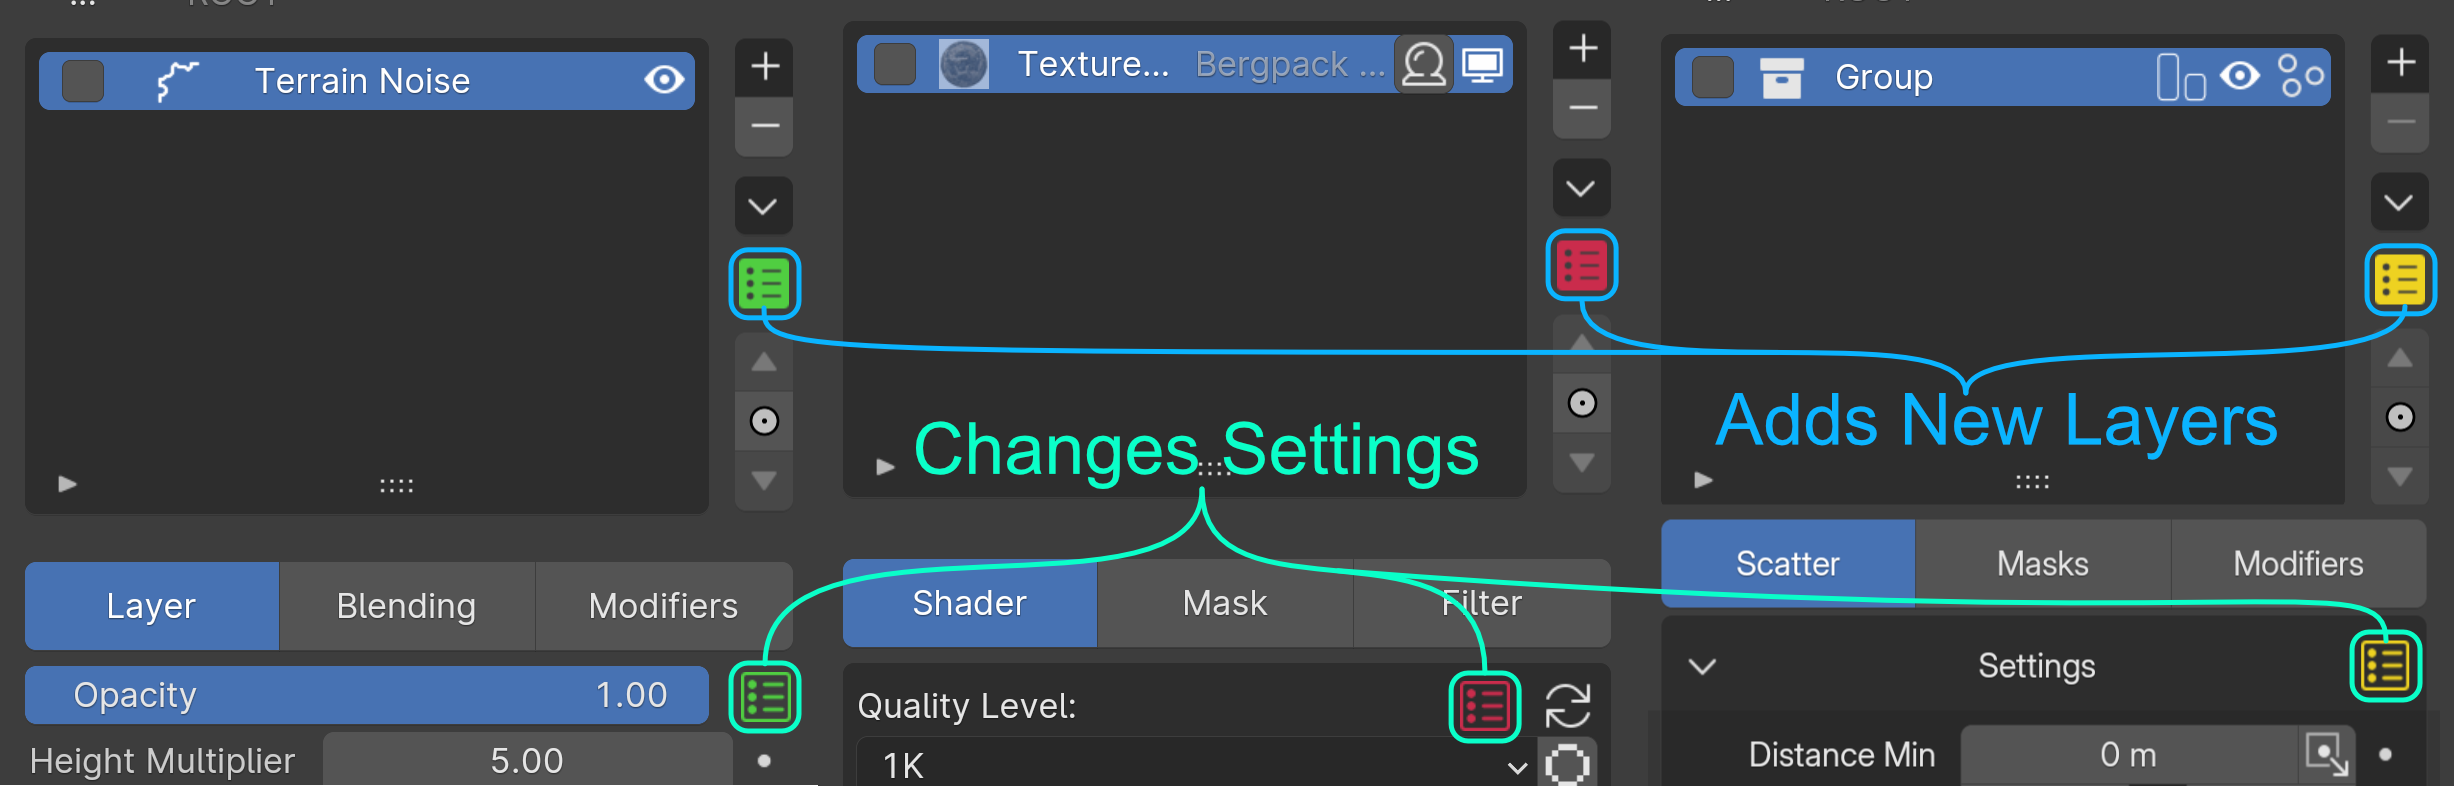
Presets Popover UI
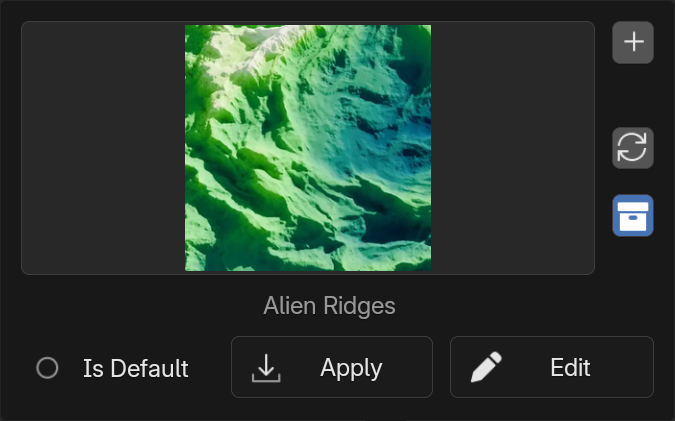
Add Preset
Add a new preset.
This will save the visible items and their settings. If adding a multi-layer preset all layers visible will be saved along with their settings and modifiers and any children layers. If just a layer settings preset then all settings and modifiers will be saved.
See preferences for the preset settings
Reload Presets
Reload the presets from disk.
Icon Picker
If an icon was added this is where it'll appear, otherwise a dotted box is there to show an icon has not been set.
Apply
Apply the preset
Edit
Change the preset.
Preferences
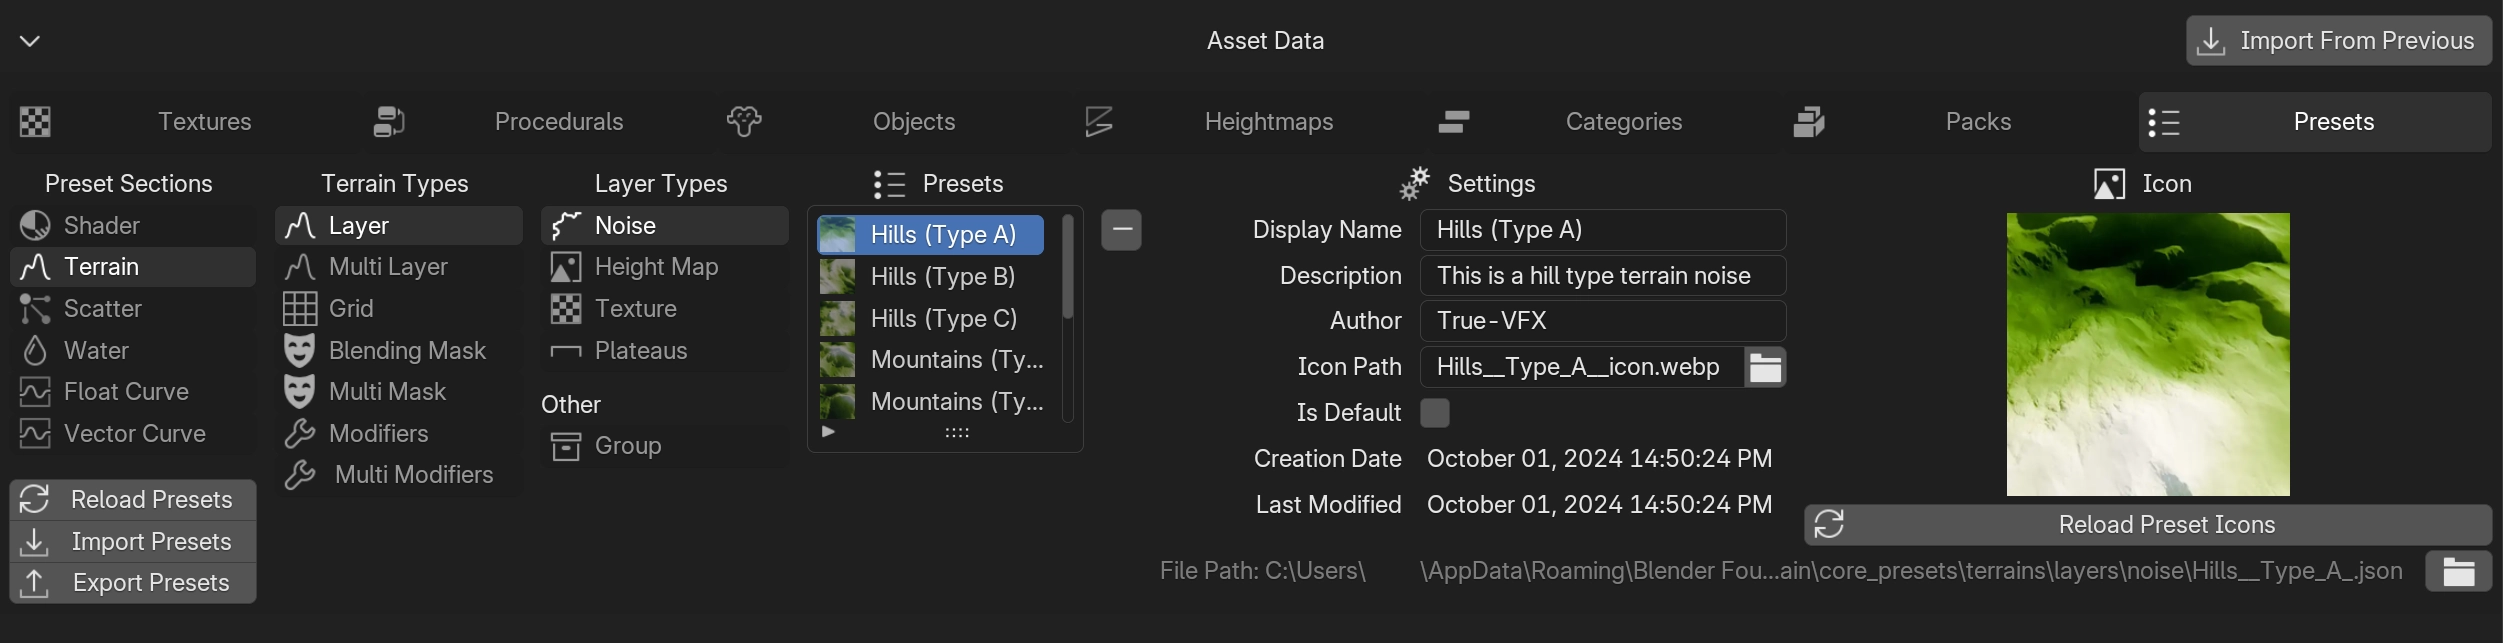
Presets UI in the Preferences
Selecting a Preset
Select the various categorires in order to find the types presets you want to find.
Display Name
The name of the preset as displayed in the viewport
Description
A brief description to be displayed when hovering over the preset in the viewport
Author
How you want to be remembered
Icon Path
Select an icon to be show next to this preset to help distinguish it from other with possibly the same name. TrueTERRAIN will optimize and copy the optimized image into your Asset Directory path so altering the image at its orginial path won't effect the one in TrueTERRAIN.
Creation Date
When this preset was first created.
Last Modified (Date)
The last time this preset was edited.
Icon
Will display an icon if one has been set.
Reload Preset Icons
Reload the icons of all presets.