Terrain
Use Blender's powerful geometry nodes to create procedural terrains that are easily changed, rearanged, and optimized for your scenes!
Getting Started
First thing to do is click the large Create Terrain button in the right hand viewport panel.

This will make the new object as the pinned object.
From here you can add more layers, change the settings in the Layer tab, blend your layers so they only show up in certain sections from the Blending tab, or modifiy the layer data in the Modifiers tab.
See below for more explanation on each section:
Export Height Map: TrueTERRAIN Mesh
With the TrueTERRAIN mesh selected go to the Geometry tab in the side panel and click on the Terrain Layer Menu between the Remove Layer and Move Layer Up buttons to the right of the Terrain Layer List.
At the bottom of the menu click Export Height Map.
From here a browser window will open up for you to select a directory to save your height map after it is exported. In the right side panel you will see the following options:
Min Value
Choose what value should be the minimum pixel value of this image.
Reminder
Non-EXR images can only save values from 0.0-1.0
Max Value
Choose what value should be the maximum pixel value of this image.
Reminder
Non-EXR images can only save values from 0.0-1.0
Extension
Choose what file type to save this as
Open After
Open up the directory after saving for quick access to the height map.
Install to TrueTERRAIN
Install this height map into TrueTERRAIN height maps after saving.
Export Height Map: Non-TrueTERRAIN Mesh
Select a mesh that was not created with TrueTERRAIN.
In the Geometry tab of the TrueTERRAIN panel click the [ Bake Object to Height Map ] button.
This will pop up a panel with the following settings that will update the visible mesh to help you visualize what the heightmap will look at:
Resolution
What resolution do you want the image to be at
Blur
Blur the height values. Helpful if the resolution is higher than the mesh's resolution and faces begin to show despite being asked to smooth the normals.
Overscan Blur
If the mesh isn't a perfect rectangle and some over hang will occur some trangulaing looks may happen. This setting helps to offset this triangular look.
From here a browser will open with the following settings:
Min Value
Choose what value should be the minimum pixel value of this image.
Reminder
Non-EXR images can only save values from 0.0-1.0
Max Value
Choose what value should be the maximum pixel value of this image.
Reminder
Non-EXR images can only save values from 0.0-1.0
Extension
Choose what file type to save this as
Open After
Open up the directory after saving for quick access to the height map.
Camera Culling
Remove parts of the terrain based upon what is visible in the active/selected camera.
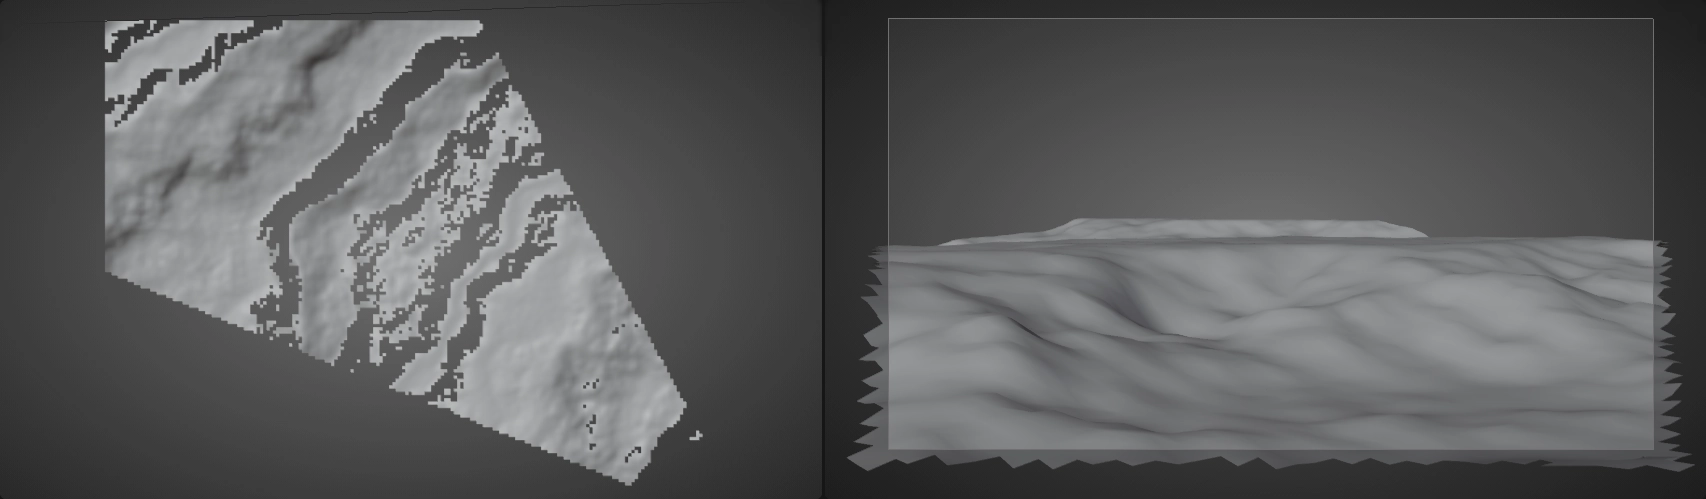
Terrain with areas outside of camera removed.
Enable Culling
Toggle the geometry culling.
Use Custom Camera
Use a camera that is not neccesarily the active scene camera.
Padding
Vary the amount outside of the camera's view that will still be visible. Sometimes, depending upon the size of each face, faces that have less than 50% of themselves visible in the camera view will be removed leaving visible holes. This padding allows for increasing the need range so that those faces won't be removed.
Use Backface Threshold
Remove faces that point away from the camera, ie are most likely not even visible to the camera due to being behind other faces.
Backface Threshold
How far away a face must point in order to be culled.
Use Scatter Close to Camera
Mainly for Scattering, but this will allow for assets that do not have their origns in the camera's view but are still visible to the camera to be not culled.
Distance (Scatter Close to Camera)
How far away from the camera a face needs to be to not be culled.